Well it had to come to an end sometime.
The car has been sold to a fellow enthusiast, Mathew.
He has a few plans to change the way the car looks and I'm sure he will enjoy every moment of it.
I had a great time building the car and modifying it, but all good things must come to an end.
I've decided to get back into Motorcycles with the money from the Lotus 7 buying me a very good condition Ducati 996.

Welcome to my Lotus 7 Replica Blog
I intend to use this blog to show the various stages as I rebuild an old Lotus 7 replica from a bit of a mess to something respectable.
Along the way i'll detail the procedures required and hopefully inspire others to do similar.

Along the way i'll detail the procedures required and hopefully inspire others to do similar.
Wednesday, August 10, 2011

Monday, April 4, 2011
Driving!
Due to the great weather recently I've managed to get a lot of driving in!
Over the last few weeks I've managed to do my daily commute to work (approx. 30km) in the 7.
Its given me a good chance to get re-acquainted with the handling and performance.
I love the way its so direct and can be flung sideways with a flick of the wrist and a bootful of throttle.
Over the last few weeks I've managed to do my daily commute to work (approx. 30km) in the 7.
Its given me a good chance to get re-acquainted with the handling and performance.
I love the way its so direct and can be flung sideways with a flick of the wrist and a bootful of throttle.
Wednesday, November 17, 2010
New Plates & Pics
Finally got around to putting my old personalised plates on.


Also have tidied up a few items on the car: repainted front steering components, painted high brake stop light, added a bit of chequer plate to the heel area of the drivers side.
Took some pics too for the Lotus7.co.nz calendar which have been accepted to be published in next years :)


Also have tidied up a few items on the car: repainted front steering components, painted high brake stop light, added a bit of chequer plate to the heel area of the drivers side.
Took some pics too for the Lotus7.co.nz calendar which have been accepted to be published in next years :)
Wednesday, September 29, 2010
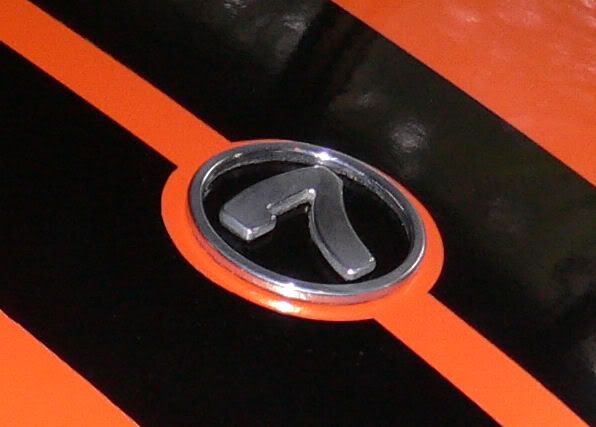
New Badge complete

Wednesday, September 22, 2010
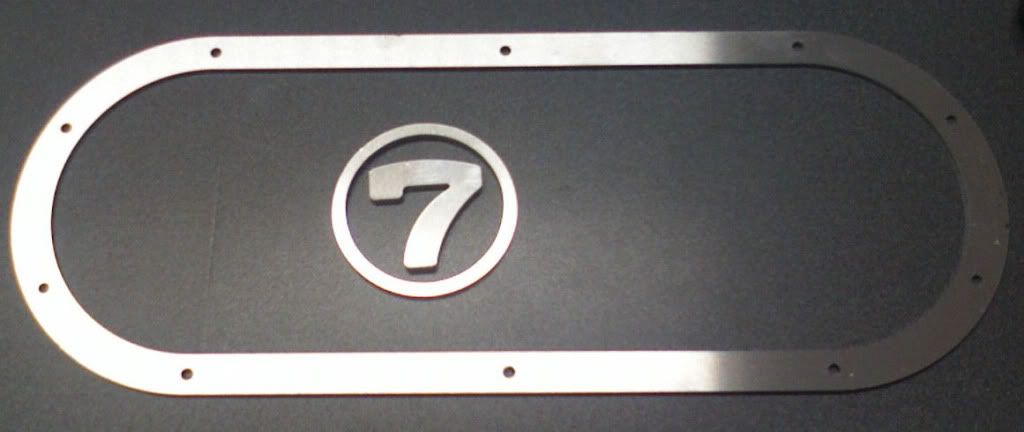
Laser cut components
Through my work we have access to a company that does Laser cutting.
I got my father a new stainless dash cut for his boat, and due to the minimum charge, I thought I'd get a few other bits done out of aluminium too!

I got some bonnet vent surrounds out of 2mm and 3 sets of badge components from 3mm.
Currently I've got some cheap Lotus badges on the bonnet/boot and will be replacing them with these!
Once they are radiused and polished they will look really nice i think!
The bonnet vents are going to go on either side of my bonnet at the front and have aluminium mesh behind them to help remove some hot air from in there.
Stay tuned and I'll post the installed pics.
I got my father a new stainless dash cut for his boat, and due to the minimum charge, I thought I'd get a few other bits done out of aluminium too!
Currently I've got some cheap Lotus badges on the bonnet/boot and will be replacing them with these!
Once they are radiused and polished they will look really nice i think!
The bonnet vents are going to go on either side of my bonnet at the front and have aluminium mesh behind them to help remove some hot air from in there.
Stay tuned and I'll post the installed pics.
Saturday, March 6, 2010
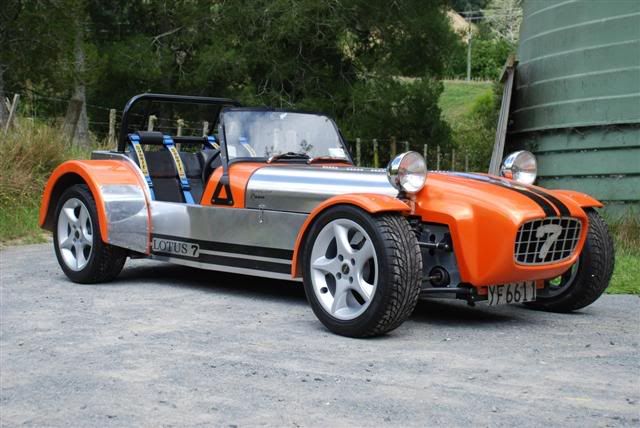
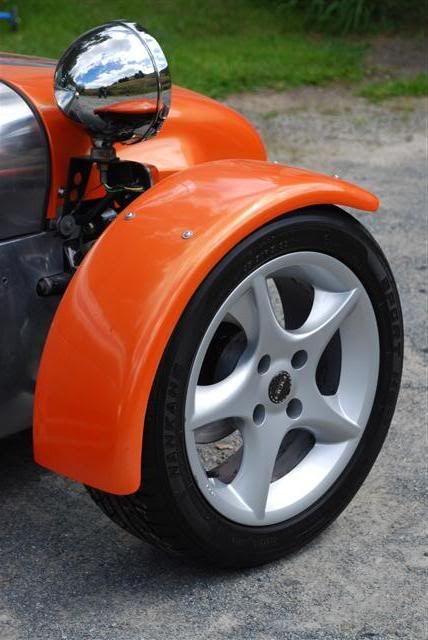
New Wheels Installed
Picked up the new wheels.
Sold my old ones on trademe and made $100 profit in the deal :)
They suit the cycleguards better as they are slighty bigger than my old 13's.


Sold my old ones on trademe and made $100 profit in the deal :)
They suit the cycleguards better as they are slighty bigger than my old 13's.
Sunday, February 28, 2010
New Wheels
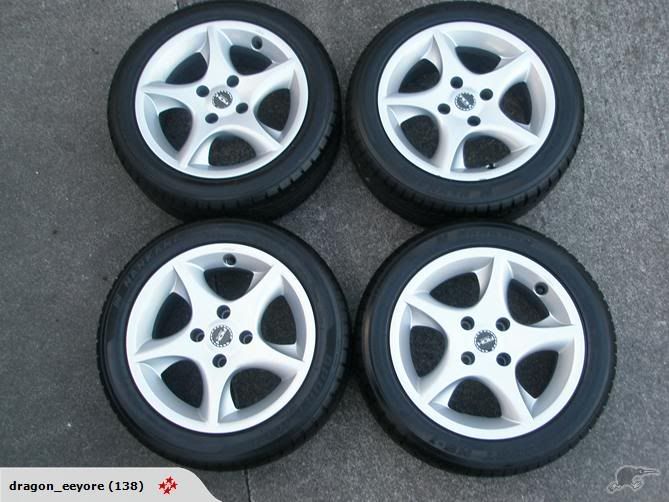
Just bought some new 15" alloys for the Seven.
They will look really nice on the car, I will pick them up next weekend.
Here's a pic of them pre-install:

They will look really nice on the car, I will pick them up next weekend.
Here's a pic of them pre-install:
Tuesday, February 9, 2010
New Gearknob
Not a big update.
Have bought a nice weighted D1 black chrome gearknob.
Such a little item has made the car feel so much nicer, the weighting has given the gearshift a massive change in feel and slickness over the old plastic Toyota knob.
Coupled with the rebuilt steering rack, its a lot more enjoyable to chuck around!
Have bought a nice weighted D1 black chrome gearknob.
Such a little item has made the car feel so much nicer, the weighting has given the gearshift a massive change in feel and slickness over the old plastic Toyota knob.
Coupled with the rebuilt steering rack, its a lot more enjoyable to chuck around!
Wednesday, January 13, 2010
Interior mods
Decided to do a little work on my interior.
Painted the alloy centre of my steering wheel a nice satin black, along with a custom horn button from some carbon sheet I made up a while ago. Also some Momo logos were added to make it look considerably better than before.
I also took some time to make up some badges for my dash switches, made on the computer, printed, lacquered and stuck on.


Painted the alloy centre of my steering wheel a nice satin black, along with a custom horn button from some carbon sheet I made up a while ago. Also some Momo logos were added to make it look considerably better than before.
I also took some time to make up some badges for my dash switches, made on the computer, printed, lacquered and stuck on.


Monday, December 21, 2009
Intake Installed
Thought I had better post an intake pic.
You can see the two intake pipes each side of the radiator, here they get nice fresh air from the front of the car.
Eventually when I replace the rad with a lower one, the intake will get air from above the radiator.
Does the job for now though!

You can see the two intake pipes each side of the radiator, here they get nice fresh air from the front of the car.
Eventually when I replace the rad with a lower one, the intake will get air from above the radiator.
Does the job for now though!

Sunday, December 20, 2009
Steering Rack installed
Installed the rebuilt rack, made a tool to do a wheel alignment, set to 3mm Toe out for awesome turn in.
Took the 7 out for a drive and what a difference, lots more feedback, self centers perfectly.
A job worth doing thats for sure.
Took the 7 out for a drive and what a difference, lots more feedback, self centers perfectly.
A job worth doing thats for sure.
Wednesday, December 16, 2009
Steering Rack Rebuild
Checked my Steering rack as it got noted during a wof that there was a little play!
Turned out the rack ends were worn and the main tube had quite a bit of slop.
Upon removal from the car it became apparent that the threaded rods on the rack ends had been badly made.
The thread was made on a tapered rod so that as the rod tapered off the threads got finer!
I was told by the friendly crew at Autosteer in Frankton that this is quite dangerous and you could actually see that only around 10mm of thread was actually being used.
New bushes to the tube, new rack ends custom machined to length/diameter and she's good as new!
Although I could have done without the $220!
While I am at it, I lubed the steering column as it has always been quite hard to turn. Hopefully this will help with self centreing, something my car never really had. If this doesn't fix it, then I will have to reset the caster to suit!

Turned out the rack ends were worn and the main tube had quite a bit of slop.
Upon removal from the car it became apparent that the threaded rods on the rack ends had been badly made.
The thread was made on a tapered rod so that as the rod tapered off the threads got finer!
I was told by the friendly crew at Autosteer in Frankton that this is quite dangerous and you could actually see that only around 10mm of thread was actually being used.
New bushes to the tube, new rack ends custom machined to length/diameter and she's good as new!
Although I could have done without the $220!
While I am at it, I lubed the steering column as it has always been quite hard to turn. Hopefully this will help with self centreing, something my car never really had. If this doesn't fix it, then I will have to reset the caster to suit!

Wednesday, December 2, 2009
Cold Air Box
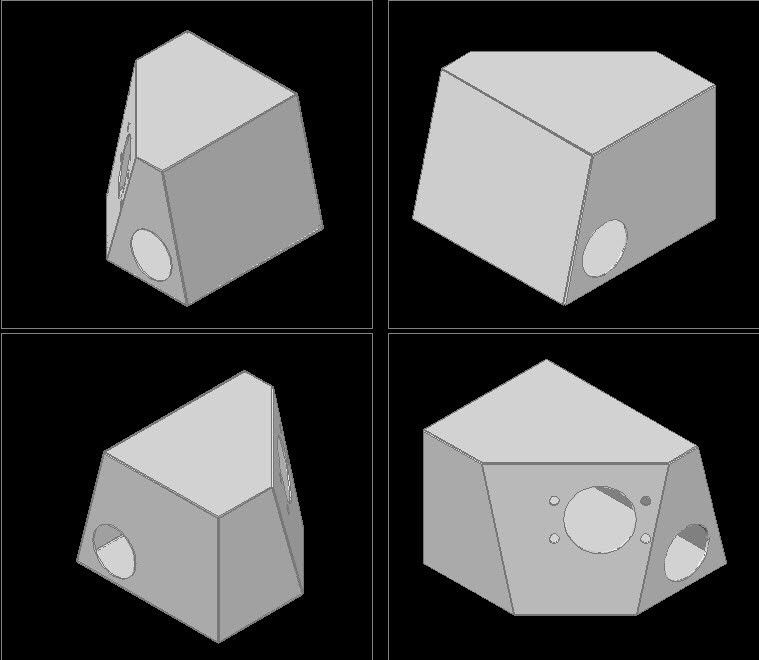
Now my intake is complete, I have been working on a Cold air box which is to be fitted at the front of the car just behind the radiator and will take cold air from around the sides via ducting that gets cold air from the nose.
See image below for the basic outline.

I'll post some pics of the finished article shortly.
See image below for the basic outline.
I'll post some pics of the finished article shortly.
Monday, November 16, 2009
Pedal box cover
I decided to build a cover for my pedal box from 1.6mm aluminium.
It was a little difficult and I had to have the throttle cable point sticking up out of it due to clearance issues, but it now cleans up the whole engine bay.
The finish will match my intake, a nice dull polished look.

It was a little difficult and I had to have the throttle cable point sticking up out of it due to clearance issues, but it now cleans up the whole engine bay.
The finish will match my intake, a nice dull polished look.
New intake
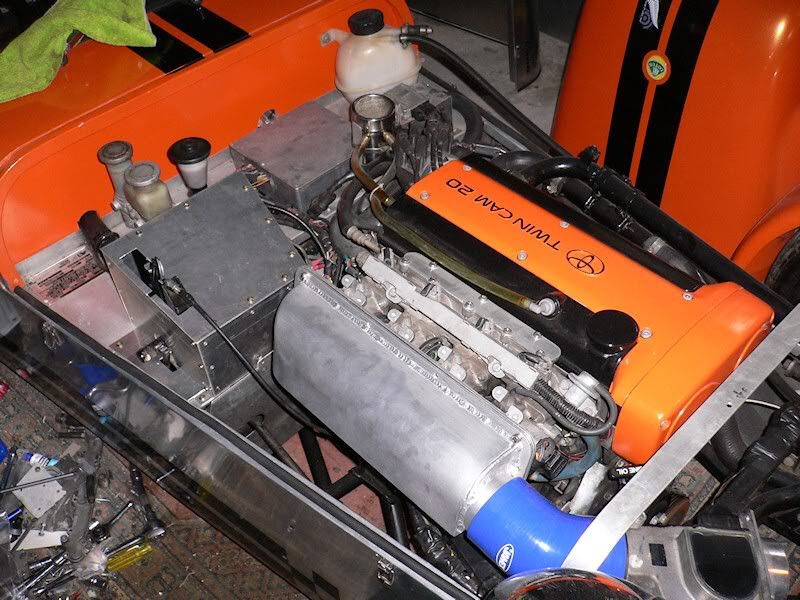
I originally made a MS intake plenum, but after closer inspection I decided to redesign it out of aluminium.
It is now a lot lighter and a lot better looking, with better airflow to the rear cylinders.
It still needs plumbing in, and now I can start on the new airbox which will sit behind the radiatior but will get fresh air from over the top. Radiator will be changed for an aluminium one when I can afford it :)

It is now a lot lighter and a lot better looking, with better airflow to the rear cylinders.
It still needs plumbing in, and now I can start on the new airbox which will sit behind the radiatior but will get fresh air from over the top. Radiator will be changed for an aluminium one when I can afford it :)
Wednesday, September 30, 2009
New Guards
While i'm on Cad i thought i would model up some new guards.

I'm looking at doing something similar to the Caterham CSR with the small semi-wing part on top.
I'll make them from MDF for the plug, with the final guard being from Carbon Fibre.
Should make the car look real good :)
While i've got the carbon out I will do some rear guard protectors too.

I'm looking at doing something similar to the Caterham CSR with the small semi-wing part on top.
I'll make them from MDF for the plug, with the final guard being from Carbon Fibre.
Should make the car look real good :)
While i've got the carbon out I will do some rear guard protectors too.
Making a new intake Plenum
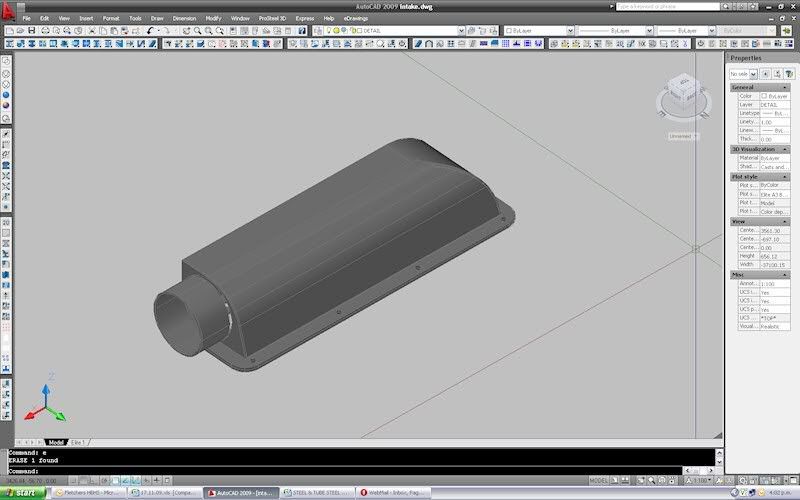
Just modelled a new intake plenum in Autocad.

Getting it made at work from mild steel plate, and tig welded up.
Will end up getting it powder-coated in black at some stage.
I will be moving the Airflow meter to the front of the car for greater efficiency and will possibly duct cold air around the radiator to a small airbox in front of the motor.
It gives me the opportunity to add a supercharger at a later date

Getting it made at work from mild steel plate, and tig welded up.
Will end up getting it powder-coated in black at some stage.
I will be moving the Airflow meter to the front of the car for greater efficiency and will possibly duct cold air around the radiator to a small airbox in front of the motor.
It gives me the opportunity to add a supercharger at a later date
Wednesday, June 10, 2009
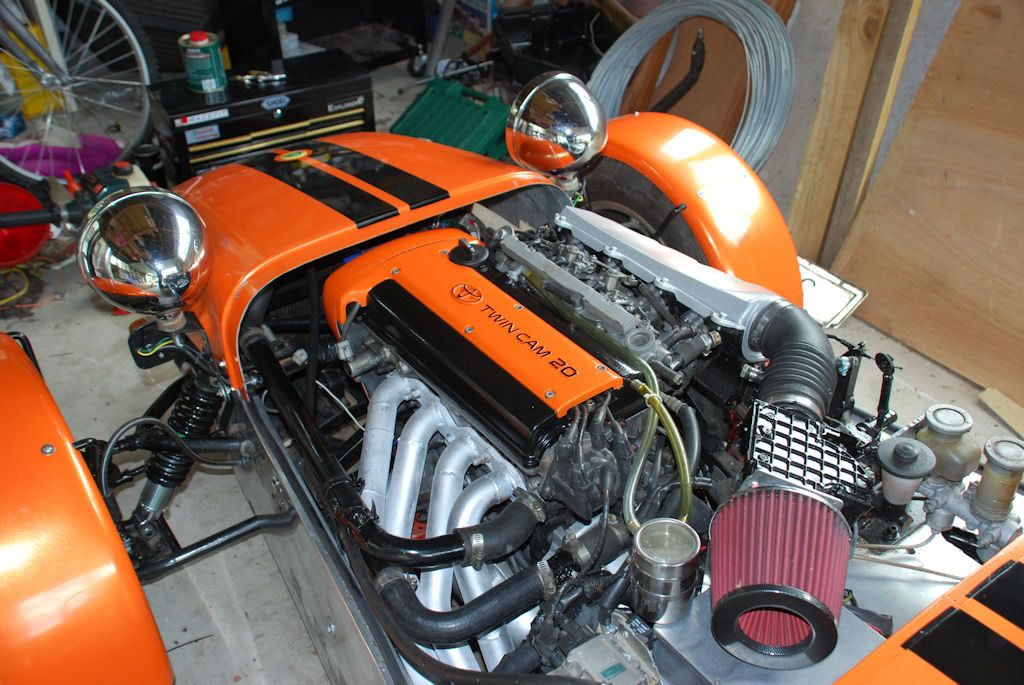
Painted Headers
Decided to tidy the white painted headers up with a lick of high temp silver. Difficult to get into all the nooks but a worthwhile improvements.
Looks a lot nicer.

Looks a lot nicer.
Sunday, May 31, 2009
Wheels on
Finally got around to fitting the tyres onto the wheels.
A little filing was required to get them to fit well on the hubs.
Minilights are the only wheels worth fitting to a 7 especially in 13" size.
A big improvement over the old Hotwires!


A little filing was required to get them to fit well on the hubs.
Minilights are the only wheels worth fitting to a 7 especially in 13" size.
A big improvement over the old Hotwires!


Sunday, May 24, 2009
New centre console
I decided to tidy up the centre console as it looked quite terrible being a bit of a hash up of old aluminium and the terrible gaiter around the gear stick!
I got some stainless steel rings laser cut through work and some aluminium folded up by my friend Brett.
I used Steel Tek screws to fasten it all down, looks good in aluminium but will cover it in black vinyl at some stage once I get the seats retrimmed or replaced.....


I got some stainless steel rings laser cut through work and some aluminium folded up by my friend Brett.
I used Steel Tek screws to fasten it all down, looks good in aluminium but will cover it in black vinyl at some stage once I get the seats retrimmed or replaced.....


Subscribe to:
Posts (Atom)